Focus Stacking for Macro Photography
Tips and Tricks
Focus Stacking for Macro Photography
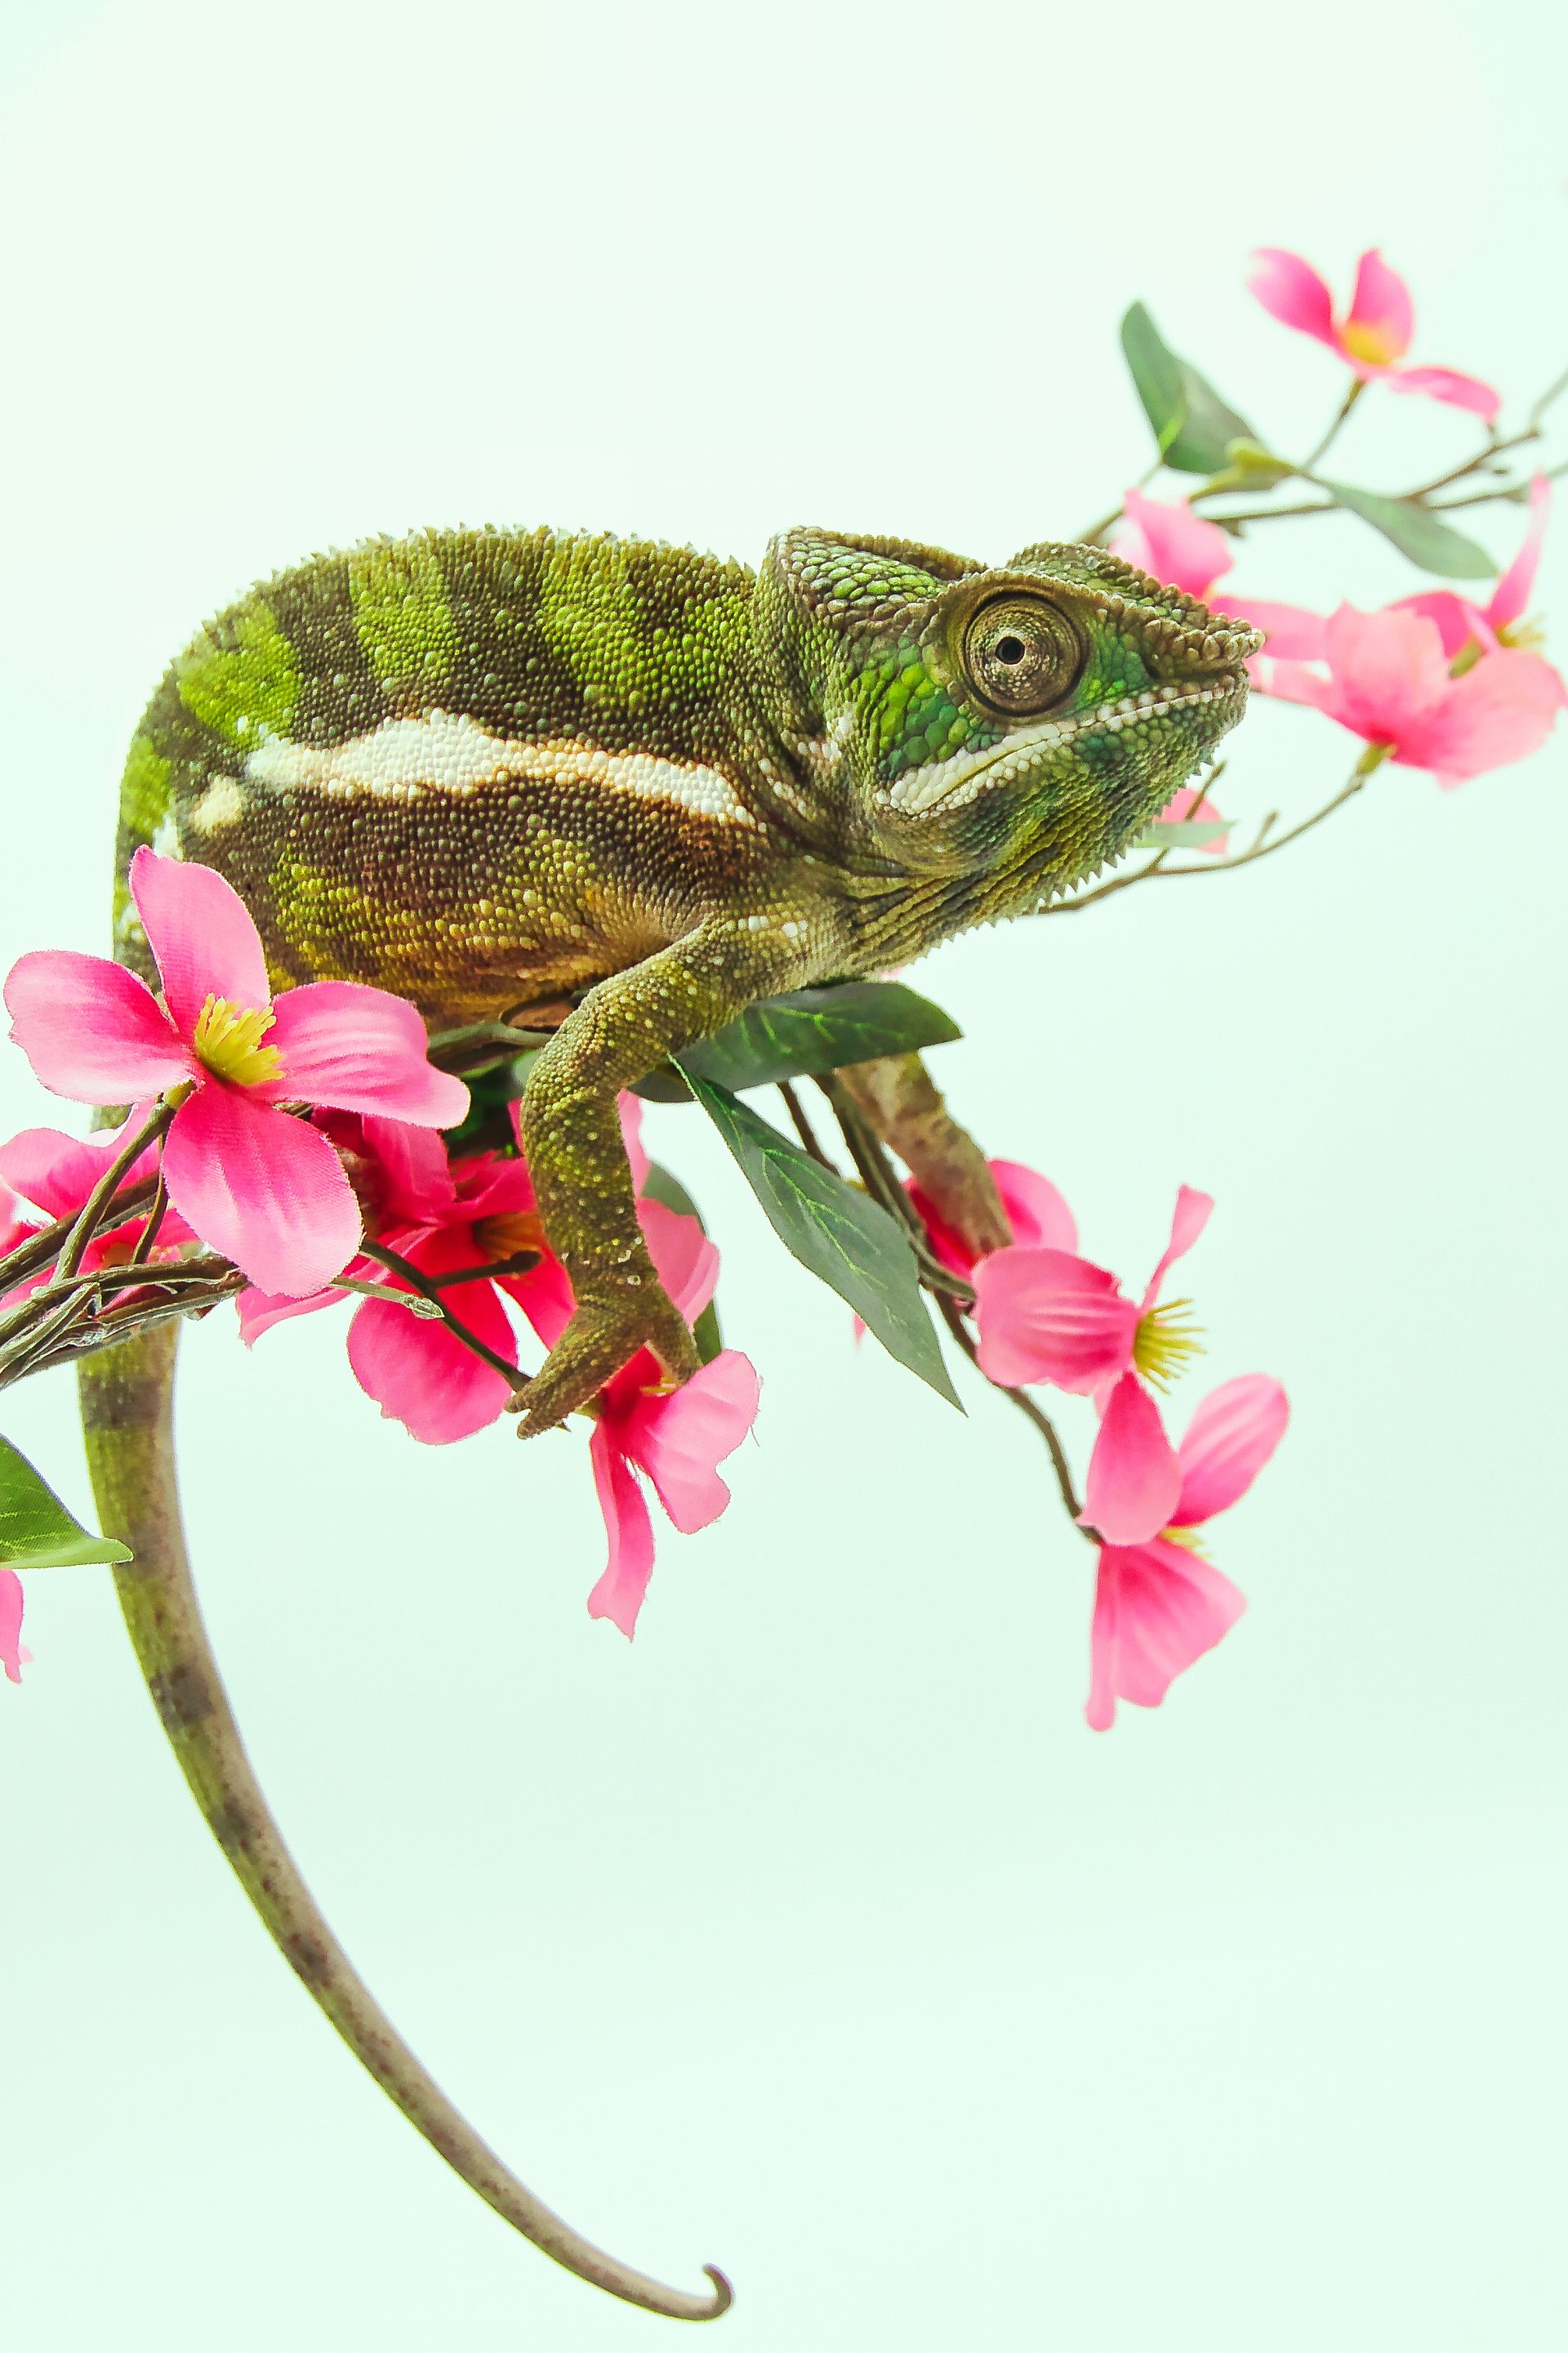
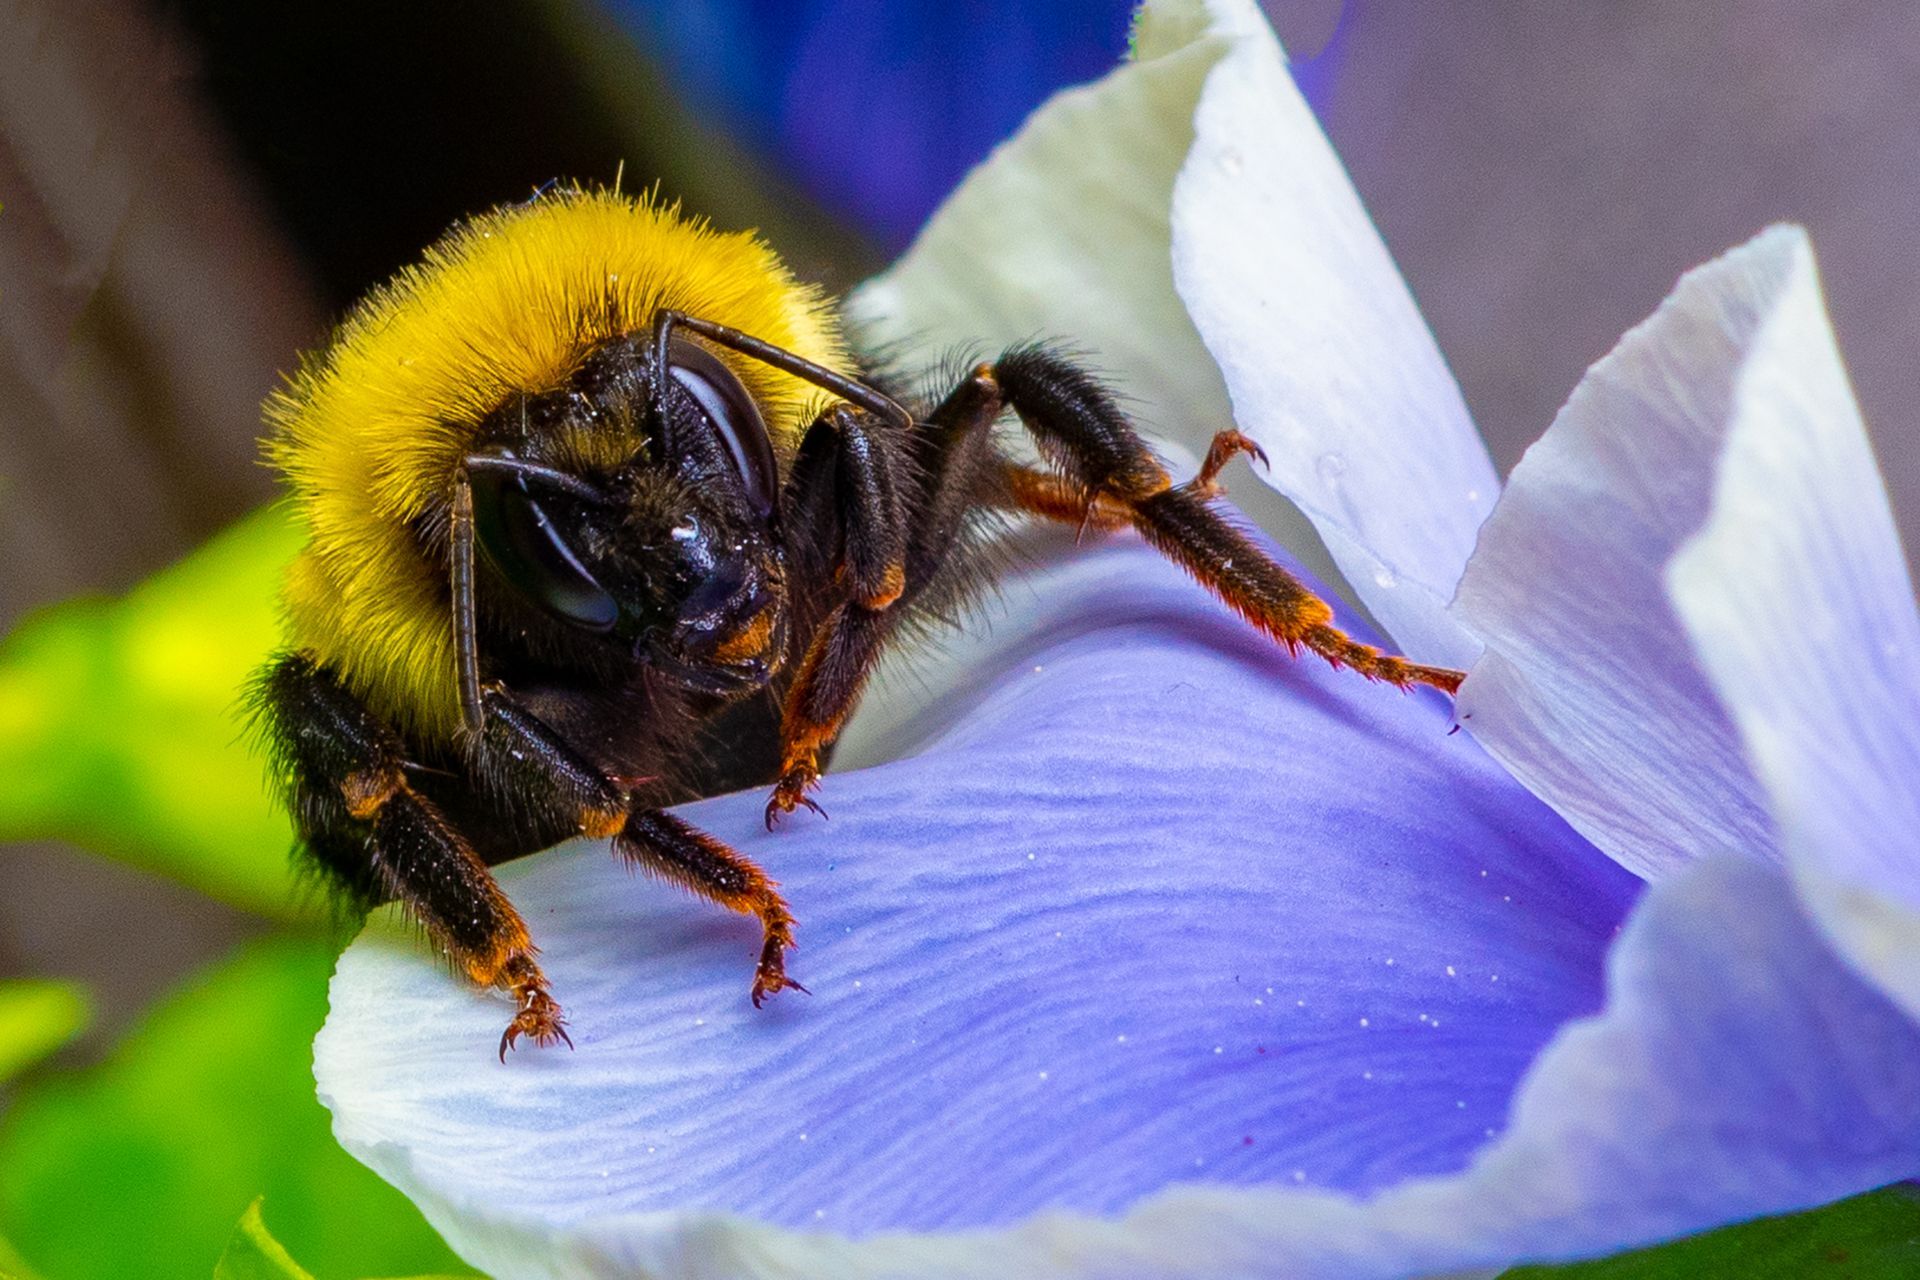
This summer I rediscovered the joy of macro photography. I spent many hours photographing flowers and insects while camping and hiking. I photographed still life images using some of the interesting items I could find around the house and challenged myself to try some new techniques as well. Macro Photography is a lot of fun, but one of the biggest challenges is to get the subject your are photographing sharply in focus. Many macro photos are stunning BECAUSE of the extremely shallow depth of field, while other subjects would look best if they were sharp from front to back. The question is, if you only have 2 millimeters of Depth Of Field and the subject of your photo is 2 centimeters long, how the heck can you get the entire object in focus? The answer is focus stacking!
Focus stacking is the process of photographing multiple images of a single subject and adjusting the focal plane in each image. The images are blended together using only the sharp areas of each image to create a final photograph where the subject of the photo is sharp from front to back. It sounds complicated (and I would categorize this as an advanced technique) but actually isn't too difficult with a little bit of practice.
What you will need to do this is a camera with some macro focusing capabilities, a sturdy tripod and a computer with Photoshop CS installed.
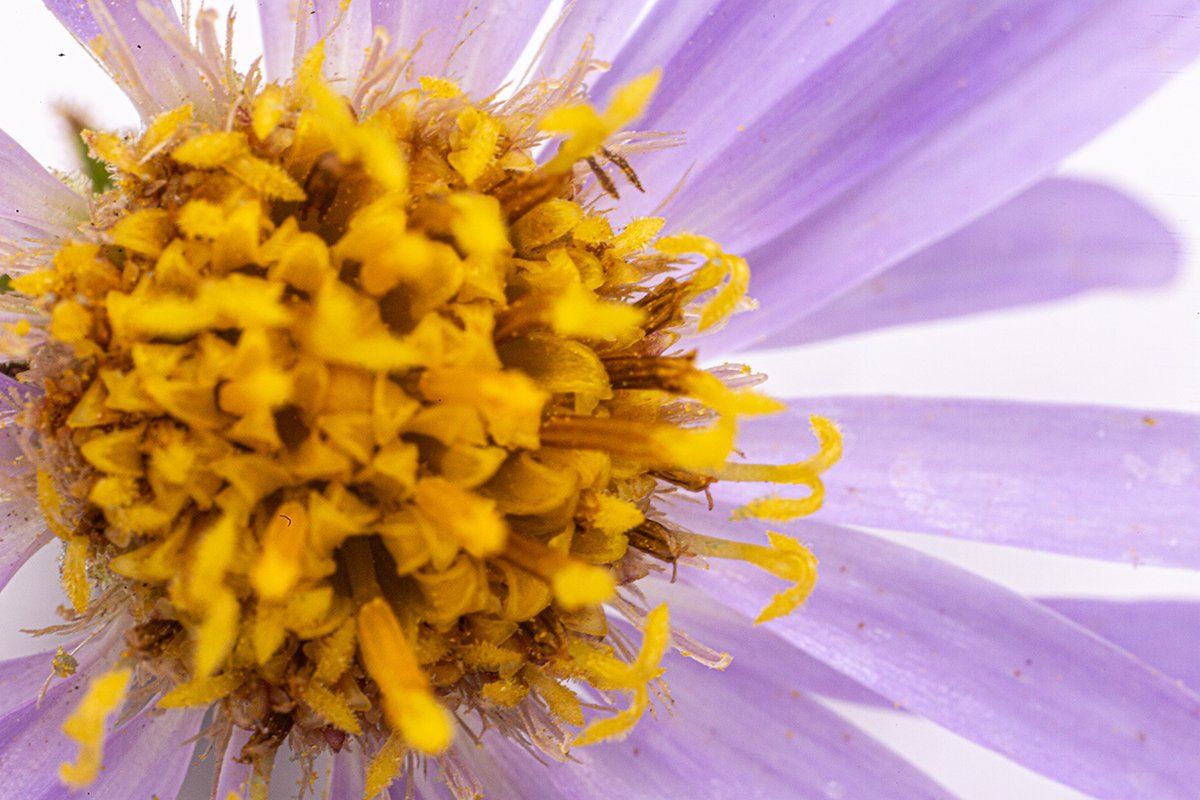
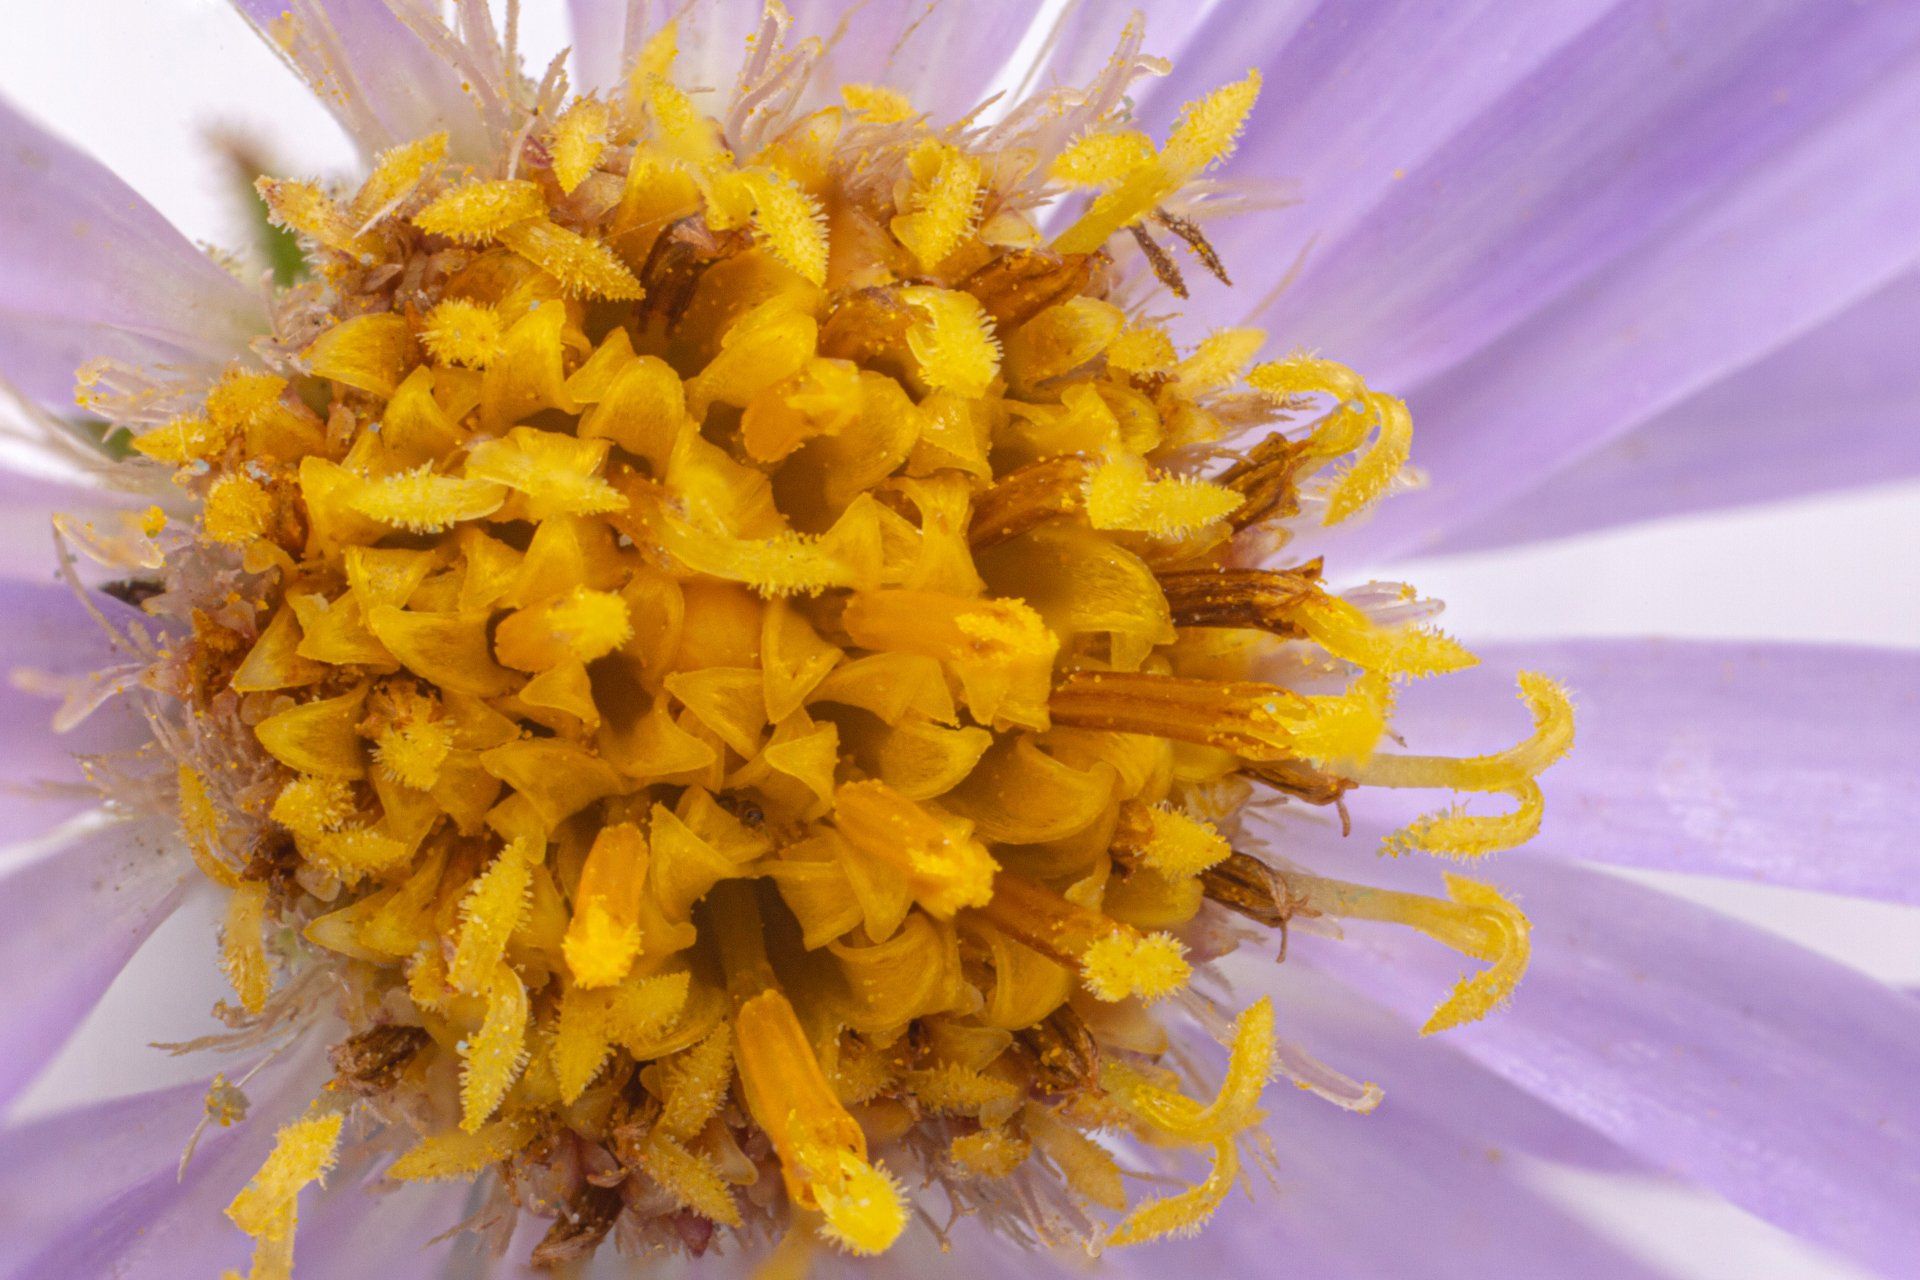
The depth of field on this image is only a millimeter deep. Only the thin sliver of the flower is sharply in focus.
STEP ONE - begin by photographing the subject of your choice. In this example, I photographed a wildflower found in the forest near Wabamum Lake. You absolutely MUST use a tripod when taking these photographs because the images must be in very close alignment for Photoshop to blend them adequately. If you have a bit of a long exposure, I also recommend that you use the mirror lock up function to reduce vibrations. A remote control shutter release is also highly recommended. If you do not have a remote, you can use the 2 second timer on your camera. This 2 second delay will allow time for any vibrations to subside before the shutter is released.
Once you have the subject framed in the viewfinder, disable the auto focus on your camera. You will need to manually focus your camera lens for this technique. Start by focusing on the subject at the point nearest to the camera lens. Once you have captured your first image, manually adjust the focus away from the camera by minute increments. Ideally, the depth of field will overlap between each image. If you have one 1mm of DOF, then adjust your focus by no more than 1mm for each image. Adjust ONLY the manual focus ring between each exposure. Adjusting any other setting will cause the images to have differences that may not result in a successfully stacked final photograph. It is a good idea to frame the composition a bit wider than you intend for your final image. This will allow for a bit of extra blending area in the final steps of the process.
Use as many images as needed to create your stacked final product.
STEP 2 - If you are inclined to edit your photos, make sure you batch process them so that all images have exactly the same edits. The images you use should be identical in all ways, except for the plane of focus on each photo.
•To do this, edit the very 1st image in the series.
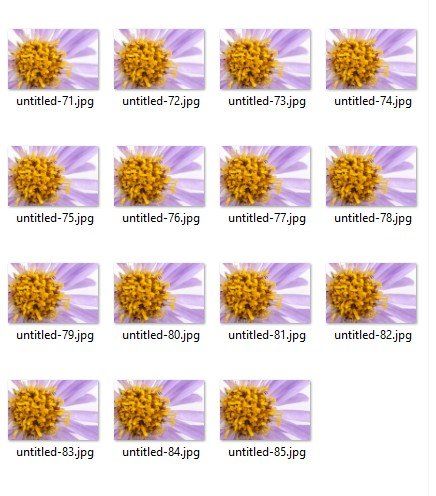
•Next, select all the images you will use for your focus stack by highlighting them on the thumbnails bar.
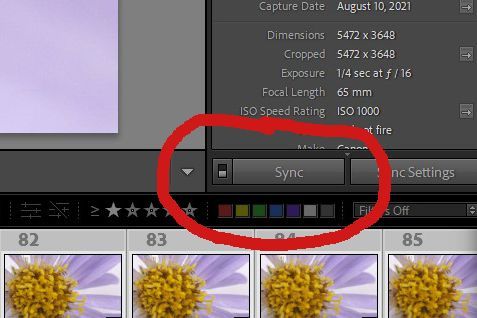
•While the multiple images are selected, click on the Sync button on the bottom right corner.
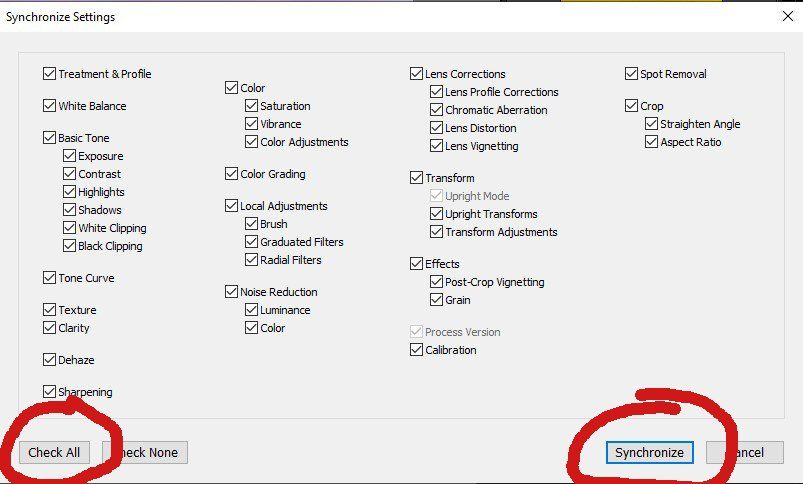
•This will open the Synchronize Settings dialog box.
•Click the “Check All” button to ensure that all your edits will be applied to the images. Click the Synchronize button to apply the edits to all images.
•Export the edited images to a unique folder.
•Save them as jpegs.
STEP 3 - Open the Images in Photoshop
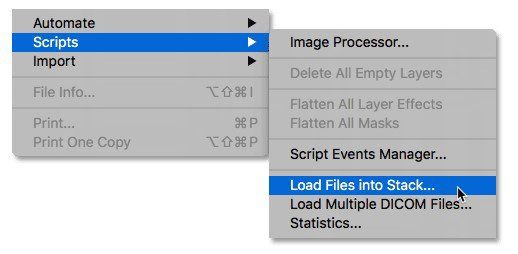
•With Photoshop open on your screen, go to the FILE menu on the menu bar. Click on SCRIPTS, then click LOAD FILES INTO STACK.
•This will open the load layers dialog box. Click the BROWSE button and select the images to be stacked.
•It is recommended to click the ATTEMPT TO AUTOMATICALLY ALIGN SOURCE IMAGES at this stage. If you do not, you can do this separately after.
•Click OK and photoshop will open each image into a separate layer in a layered PSD file.

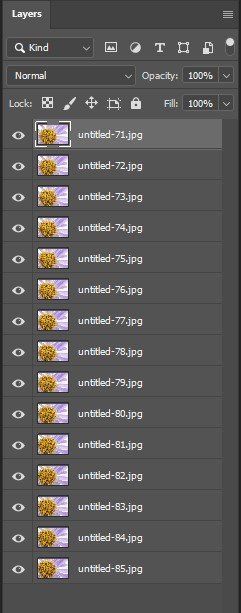
Photoshop will create a layered PSD file with the images you select. The layers palette should look something like the image above.
STEP 4 - Align the Layers
•If you did not auto align the layers when importing them into photoshop, then you must do so now. It is not a bad idea to run the ALIGN IMAGES script a 2nd time, even if you did click auto align.
•First, you must select all the layers in the panel. Click on the layer at the bottom of the palette. Then hold the SHIFT key while clicking on the top layer. All layers should be highlighted, indicating that all layers are selected.
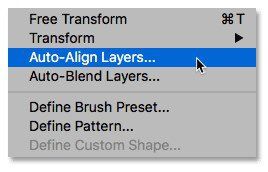
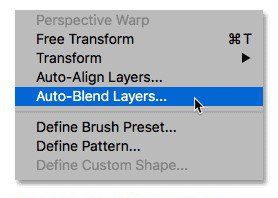
•Under the EDIT menu on the menu bar, select AUTO-ALIGN LAYERS.
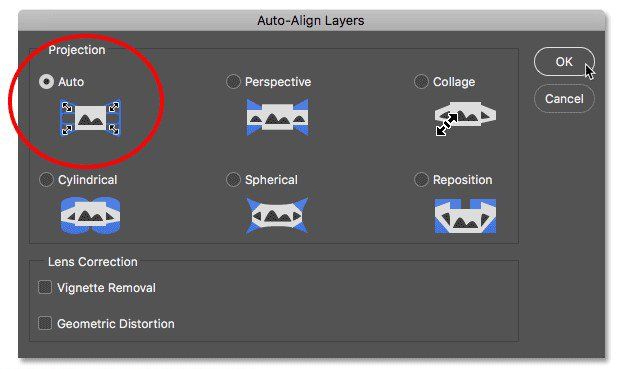
•This will open the AUTO ALIGN LAYERS dialog box. Select AUTO and click OK.
•It is critical that the layers are in precise alignment. The AUTO-ALIGN function will individually size, crop, rotate, and shift each layer so they are in precision.
•No matter how careful you are when creating the images, each layer will be slightly different. This is due to a phenomenon called FOCUS BREATHING. It is not possible to avoid focus breathing as every time we adjust the focal plane on our lens, it changes the scale of the scene, even if the camera and subject were 100% still.
STEP 5 - Blend the Layers
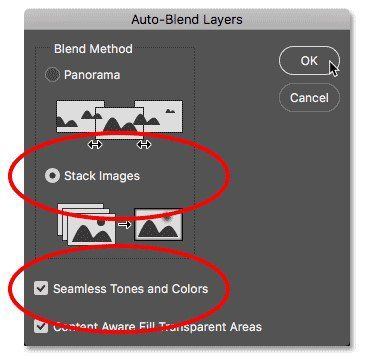
•Under the EDIT menu on the menu bar, select AUTO-BLEND LAYERS.
•This will open the AUTO-BLEND LAYERS dialog box. Select STACK IMAGES and SEAMLESS TONES AND COLORS. You do not have to check the Content aware Fill option as the image will need to be cropped anyways.
•Click OK and be patient. It might take a while to complete the script.
STEP 6 - Merge, Crop and Save
•Once the script is complete, you will notice that each layer now has a layer mask. The area in black is now hidden, the area in white is the part of each layer that is being used to create the stacked image.
•Now, merge the layers into a single layer. Go to the LAYERS menu in the menu bar.
•Select MERGE VISIBLE. This will discard the hidden areas of each layer and leave you with a single, blended layer. The subject in your photo should now be sharply in focus.
•You may notice some transparent areas on the edges of the final image. These must be cropped out. You may simply want to adjust the cropping for compositional reasons. Choose the crop tool and crop the image to your desired dimensions.
•Once you have the image cropped properly, choose SAVE AS and save the final image as a jpeg.
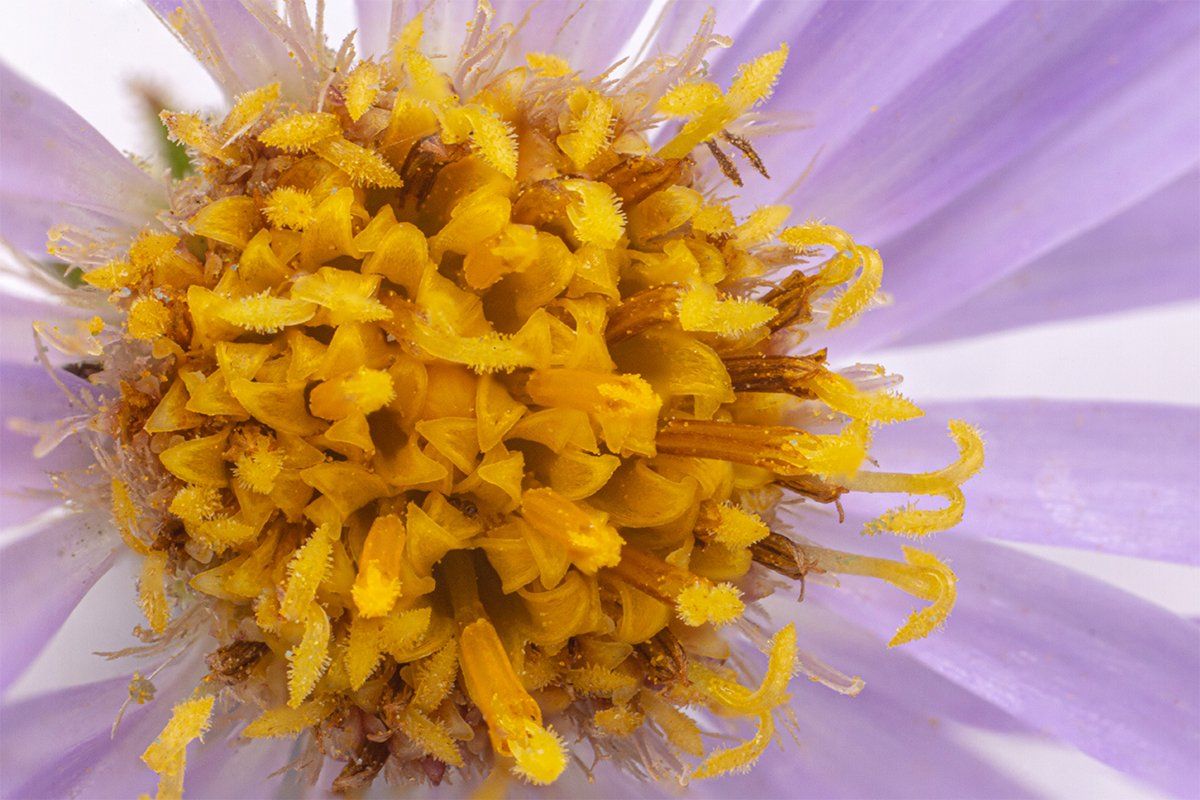
The final image will have the subject sharply in focus from front to back creating something that would have been impossible using only camera techniques.